


Wire Wrapping Stones for Beginners: Tools, Wire, and a Little Patience
If you’ve ever looked at a beautiful wire-wrapped stone and thought, “I could make that!”—welcome to the wonderful world of wire wrapping.
And if you’ve ever tried to make one and ended up with something that looks less like a beautiful pendant and more like a tiny metal bird’s nest…welcome anyway. You’re in the right place.
Wire wrapping is one of those crafts that looks incredibly complicated when you see an experienced artist doing it. There are gorgeous twists, loops, swirls, perfectly straight wraps, and stones that look like they were born to be jewelry.
Then you try it yourself.
Suddenly the wire has opinions.
It bends where you don't want it to bend, refuses to make a nice loop, and somehow manages to poke you in three different places at once.
But don't give up! Once you get the hang of a few basic techniques, wire wrapping is a wonderfully relaxing and creative craft. And the best part? You don't need a giant workshop full of expensive equipment to get started.
The Basic Tools You'll Need And What They Are Good For
You really only need a few basic tools to begin. You can always add more later, because apparently crafting means slowly acquiring enough supplies to open your own store.
Round-Nose Pliers
These are one of your most important tools.
Round-nose pliers have smooth, rounded jaws that taper toward the tip. They're perfect for making loops, curves, hooks, and spirals.
You'll use them constantly.
One thing you'll quickly learn is that where you place your wire on the pliers determines the size of your loop.
Closer to the tip = smaller loop.
Farther down the pliers = larger loop.
This sounds simple until you're trying to make two loops exactly the same size.
Then suddenly you're measuring them like you're building a bridge.
Don't worry. Your eye gets better with practice.
Chain-Nose Pliers
Chain-nose pliers have flat, tapered jaws and are excellent for gripping and bending wire.
They're great for holding one section of wire while you're wrapping another and for getting into those little spaces where your fingers simply cannot go.
You will also use them for fixing things.
And by "fixing things," I mean gently convincing the wire that your original plan was actually a better idea.
Flush Cutters
These are for cutting your wire.
A good pair of flush cutters will give you a nice, clean cut so you don't have sharp little pieces sticking out of your finished jewelry.
Because nothing says beautiful handmade pendant quite like accidentally stabbing yourself with it.
Always check your wire ends and smooth them when necessary.
Nylon-Jaw Pliers
These aren't absolutely necessary when you're starting, but they are very handy.
Nylon-jaw pliers let you straighten and manipulate wire without putting as many marks in it.
They're especially helpful once you start working with wire that you don't want covered in little plier teeth marks.
Think of them as the gentle version of your regular pliers.
A Ruler
Yes, a ruler.
It isn't exciting, but measuring your wire can save you from a lot of frustration.
There is nothing quite like spending twenty minutes making something beautiful and then discovering you are about three inches short of wire.
At that point, you will learn some new vocabulary.
A Small Jewelry File
A small file can help smooth sharp wire ends.
Even when you've made a clean cut, it's a good idea to run your finger carefully over the finished piece and make sure there aren't any little sharp spots waiting to attack you later.

Choosing Your Wire
Now we get to the fun part: wire!
There are different sizes, materials, colors, and hardnesses of wire, and choosing the right one can be confusing at first.
Let's make it a little simpler.
Understanding Wire Gauge
Wire is usually sold by gauge.
Here's the part that seems backward:
The higher the gauge number, the thinner the wire.
So:
20 gauge = thicker
22 gauge = medium
24 gauge = thinner
26 gauge = even thinner
28 gauge = very thin
Yes, it seems backwards.
No, you are not the only person who has stared at the packages trying to remember which one is thicker.
20-Gauge Wire
20-gauge wire is a nice, sturdy wire that works well for the main structure of many pendants.
It's strong enough to hold its shape but still workable with basic jewelry tools.
It can take a little more effort to bend, especially when you're new to wire wrapping.
This is also when you'll discover that apparently you have muscles in your hands you never knew existed.
22-Gauge Wire
22-gauge is a great middle-of-the-road option.
It can work for structural parts as well as some decorative wrapping, depending on your design and the stone you're using.
If you're building your beginner wire collection, having some 20- and 22-gauge wire around gives you lots of options.
24-Gauge Wire
Now we're getting into the thinner stuff.
24-gauge is great for wrapping, weaving, and adding decorative details.
It's easier to bend and manipulate than thicker wire, which makes it fun for creating patterns.
Just remember that thin wire is also easier to kink.
And once wire gets a kink in it, it will often stay there forever like a tiny metal reminder of your mistake.
26- and 28-Gauge Wire
These thinner gauges are excellent for delicate wraps and small decorative details.
They're also more fragile.
Use a light touch and try not to repeatedly bend the same section.
If you get frustrated and start pulling on it like you're trying to win a tug-of-war, the wire will probably win.

What Kind of Wire Should You Buy?
There are several types of jewelry wire available, and they all behave a little differently.
Copper Wire
Copper is one of my favorite choices for beginners.
It's affordable, easy to work with, and comes in a variety of finishes and colors.
It's perfect for practicing because you can experiment without worrying about wasting expensive materials.
And trust me, you are going to waste some wire.
It's not failure.
It's tuition.
Colored or Coated Craft Wire
Colored and coated wires are a lot of fun.
You can match your wire to the stone you're working with or use a contrasting color to make the stone stand out.
Just be careful with your pliers because rough handling can damage the coating.
Once you learn how much pressure you actually need, your wire will thank you.
Well, it won't actually thank you.
But it won't look beat up either.
Sterling Silver
Sterling silver is beautiful and makes gorgeous jewelry.
It's also more expensive than copper, so I recommend getting comfortable with your technique before using it for complicated projects.
There is a special kind of sadness that comes from making an expensive piece of wire look like it was attacked by a squirrel.
Practice first.
Gold-Filled Wire
Gold-filled wire is another beautiful option for jewelry making.
It is different from inexpensive gold-colored craft wire and can be a lovely choice for finished pieces.
But again, I would recommend practicing with less expensive wire first.
Your first attempts are for learning—not for accidentally creating a $40 pile of expensive spaghetti.
Don't Forget Wire Temper
You'll also see wire described as dead soft, half-hard, or hard.
This refers to how easily the wire bends and how well it holds its shape.
Dead Soft
Dead-soft wire is very easy to bend.
This makes it especially useful for wrapping and shaping.
If you're just getting started, this is a friendly place to begin.
Half-Hard
Half-hard wire has more resistance and holds its shape better.
It can be useful for structural parts and pieces that need a little more strength.
Hard
Hard wire is much stiffer.
It's generally not where I would recommend a beginner start unless you enjoy fighting with your supplies before you've had your morning coffee.
You can find some great starter options at local craft stores or here at Fire Mountain Gems and Beads

Choosing Your First Stone
Not every stone is beginner-friendly.
When you're starting out, look for stones that are relatively sturdy and have a shape that gives you something to work with.
Tumbled stones are particularly nice because they have smooth edges and are easy to handle.
As you gain confidence, you can experiment with rough stones, cabochons, crystals, unusual shapes, and all sorts of interesting pieces.
And don't feel like your stone has to be perfect.
Sometimes the weirdest-shaped stone makes the coolest pendant.
You just have to figure out how to convince the wire to cooperate with it.
Beginner Tips That Will Save Your Sanity
Practice Before You Use Your Favorite Stone
Please learn from my mistakes.
Don't pull out the most beautiful stone you've ever found and decide it's going to be your very first project.
Start with inexpensive stones and scrap wire.
Practice making:
Loops
Wrapped loops
Spirals
Coils
Simple bends
Consistent wraps
You're teaching your hands how the wire behaves.
Eventually, your hands will start doing things automatically.
Until then, there may be some creative language involved.
Use a Marker or Pen as a Mandrel
Need to make a nice, round loop?
Wrap your wire around something round.
A marker, pen, knitting needle, dowel, or another smooth cylindrical object can work beautifully.
Different sizes will give you different-sized loops.
It's a simple trick, but it can make your designs much more consistent.
Keep Your Wraps Close Together
When you're wrapping one wire around another, try to keep your wraps neat and close together.
Don't worry about perfection.
Your first wraps may look like they were done during an earthquake.
That's okay.
With practice, you'll get them straighter and more consistent.
Don't Keep Bending the Same Spot
This is a big one.
Wire can become harder and more brittle when it's repeatedly bent back and forth.
So instead of constantly adjusting the same little section, try to make your bends deliberately.
In other words, measure twice and bend once.
Or at least bend fewer times than I did.
Don't Squeeze Your Pliers Too Hard
You don't have to crush the wire.
Especially with soft or coated wire, too much pressure can leave marks.
Use a gentle grip and increase the pressure only when you need it.
Your pliers should be helping you—not declaring war on the wire.
Sometimes I'll wrap painters tape around the tip of my pliers to keep them from biting the wire.
Leave Extra Wire
When you're starting out, leave yourself more wire than you think you'll need.
You can always cut extra off.
You cannot wish three more inches of wire into existence.
I've tried.
It doesn't work.
One of My Favorite Tricks: Don't Fight the Stone
This is something I think you learn more with experience.
Instead of deciding exactly what your wire design has to look like, take a look at the stone first.
Is it long and narrow?
Round?
Irregular?
Does it have an interesting point or curve?
Let the shape inspire the design.
Sometimes the stone will practically tell you what it wants.
And sometimes it will tell you to wrap it one way, you'll try another way anyway, and eventually you'll admit the stone was right.
Stones can be annoyingly opinionated.
And Then There Are Mistakes…
There will be mistakes.
Lots of them.
You'll cut wire too short.
You'll make a loop too big.
You'll wrap something backward.
You'll accidentally drop your stone.
You'll spend fifteen minutes trying to fix something only to discover that you made it worse.
And occasionally you'll look at your project and think:
What in the world am I making?
Keep going.
That's how you learn.
Your first piece doesn't have to be perfect. In fact, it probably won't be.
The goal of those first projects is to learn how the tools feel, how the wire bends, how much pressure to use, and what techniques you enjoy.
Eventually, something changes.
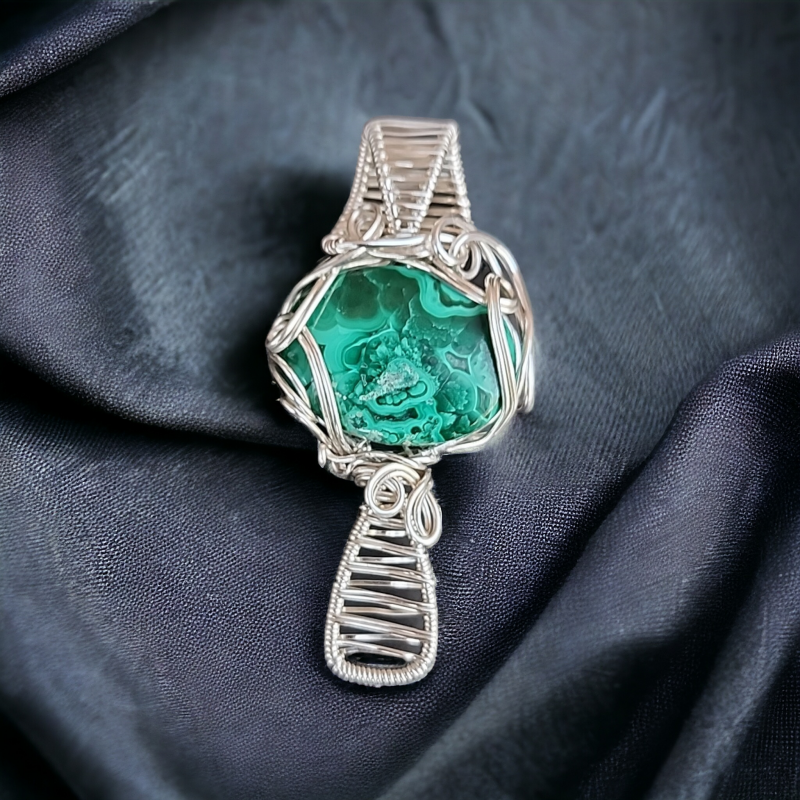
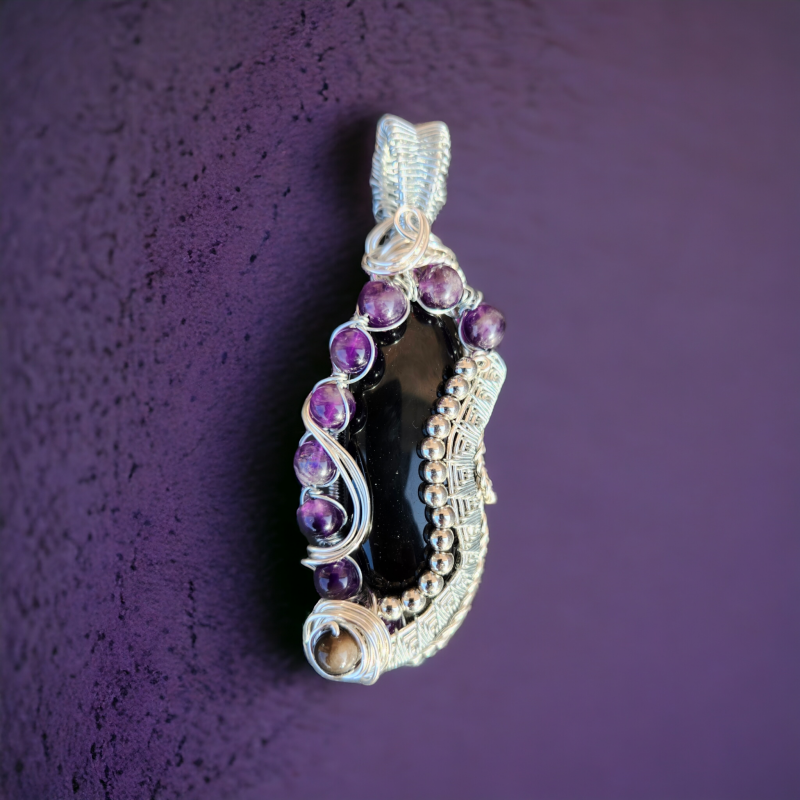
You pick up a stone, grab your wire and pliers, and start wrapping.
You don't have to think about every single movement anymore.
And suddenly you're making something that actually looks like the picture you had in your head.
That's a pretty great feeling.
The Best Part? Every Stone Is Different
That's what I love most about wire wrapping.
Every stone gives you a new challenge.
You can choose the wire based on the stone's color.
You can let the shape determine the design.
You can add spirals, coils, loops, weaving, or whatever else you feel like trying.
And because you're making it by hand, it doesn't have to look exactly like anyone else's.
Crooked doesn't necessarily mean wrong.
A little imperfection is part of handmade art.
And if something goes completely sideways?
Well…that's what the wire cutters are for.
So grab some inexpensive wire, a few stones, your pliers, and a healthy supply of patience.
Start simple.
Make mistakes.
Learn from them.
And most importantly, have fun.
Because somewhere along the way, you'll stop thinking, “I'm trying to learn wire wrapping,” and start thinking:
“I wonder what I can make with this stone…”
And that's when you're hooked.
Add comment
Comments